Adding your Static or Animated Overlay to Snappic
We are adding step by step instructions for each software we work with.
We always recommend using tinypng.com to compress your overlay.png before uploading your templates to any software.
VideoFX Side
Adding by file type in VideoFX
MP4 Overlay or APNG

MP4 Overlay or APNG
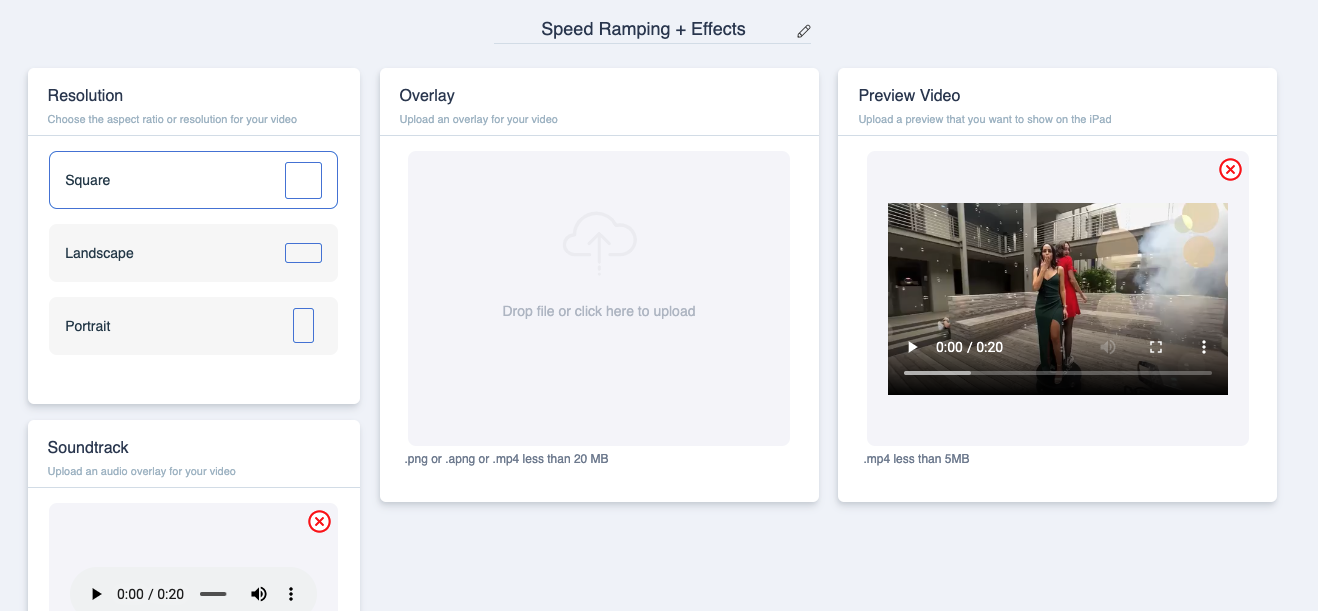
- Pick a Template from the Template Library or Create a New Template.
- Resolution: Check to see which orientation you ordered. Square, Landscape or Portrat. Select whichever one you picked.
- Drop either MP4 Overlay or APNG into the Overlay Section.
- Click on Timeline
- Here is the tricky part: Depending on the template you pick you may have to adjust the playback range times in the Timeline. While changing these times keep an eye on the Total Time on the right side.
- Click Save and have a great event.
Tip: For right now if you plan on using a Video Intro (Pre Roll) and/or a Video Outro (Post Roll) you will have to combine the files together to make one file.
Static PNG

Static PNG
- Pick a Template from the Template Library or Create a New Template
- Resolution: Check to see which orientation you ordered. Square, Landscape or Portrat. Select whichever one you picked.
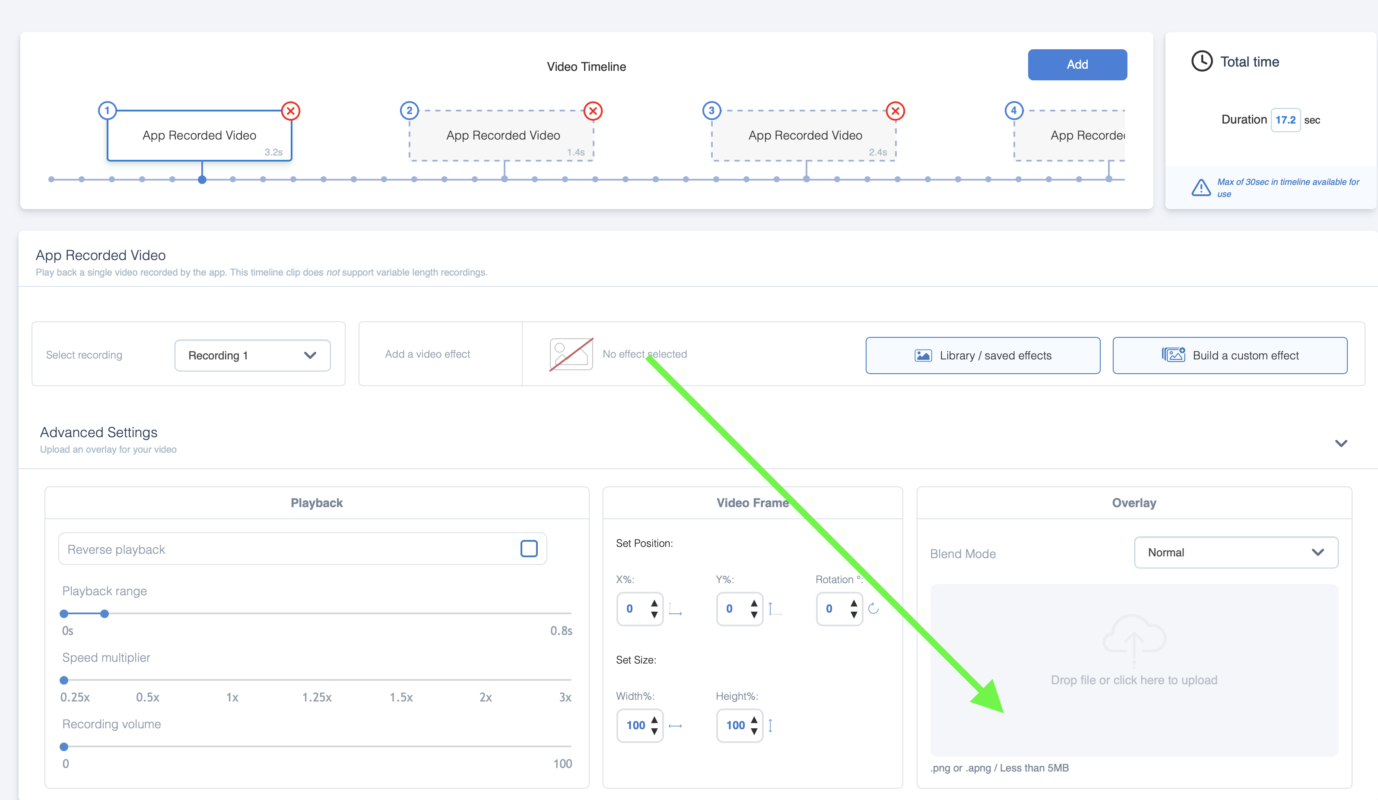
- Click on Timeline.
- Click on Add
- Add the “App Recorded Video”
- Click on “Advanced Settings”
- In the Overlay Section upload the PNG
- Set the Blend for “Normal”
- Click Save and have a great event.
In case of using a preset from the library add your png to every “app recorded video” section in the preset.
MP4 MASK

MP4 Mask
- Pick a Template from the Template Library or Create a New Template
- Resolution: Check to see which orientation you ordered. Square, Landscape or Portrat. Select whichever one you picked.
- Click on Timeline.
- Click on Add
- Add the “App Recorded Video”
- Click on “Build a custom effect”
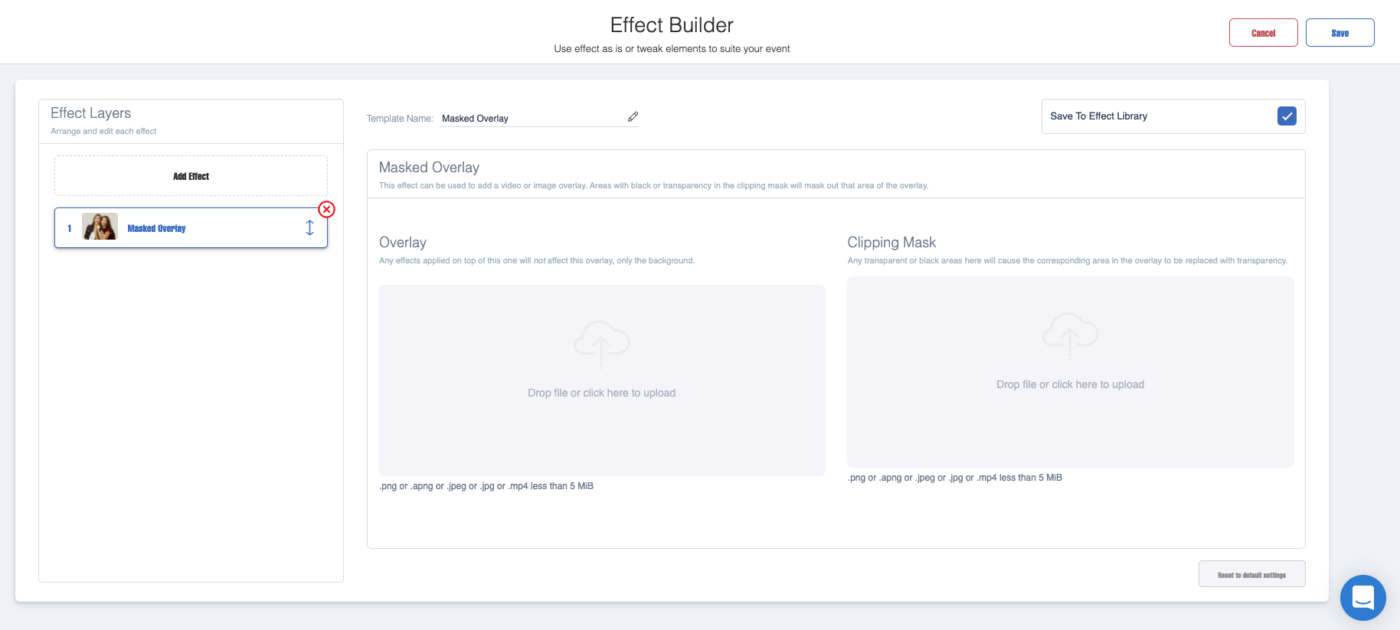
- Give the template a name. Example: Masked Overlay
- Check “Save To Effect Library”
- Click on “Add effect”
- Click on “Masked Overlay”
- You will have two files. One that is design and the other that is called “masked” in the file name. Place the visual design in the “overlay” section. Place the black and white video into the “Clipping Mask” section.
- Click Save
- Here is the tricky part: Depending on the template you pick you may have to adjust the playback range times. While changing these times keep an eye on the Total Time on the right side.
- Depending on the effects you pick you may have to have multiple masked overlays to create the one long animated overlay. The easiest way is to pick one effect like Slow Motion then run the video for the entire length of the effect. If you need more than 3 effects then a 30 second video would need to be cut into Three 10 second mp4 mask with a total of 6 files. We would need to make this decision during the ordering process. Otherwise, you could use a video editing software to trim and make the extra videos.
- Click Save and have a great event.
AI Seg – Character Reveal Cheat Sheet
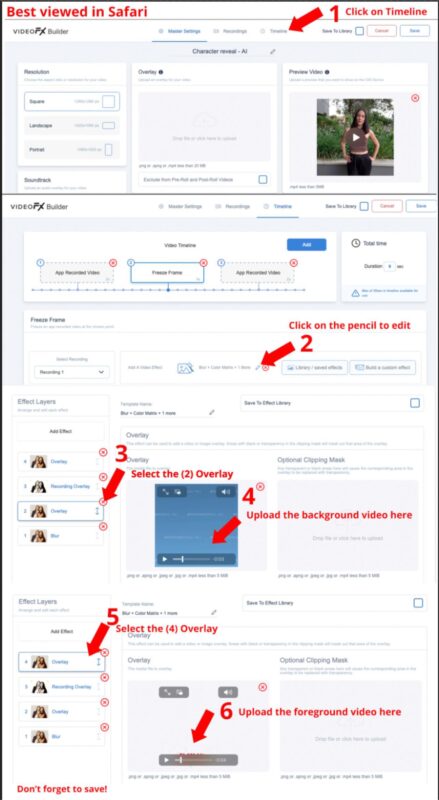
Photo Booth Side
How to create a new template in Snappic
Photo, Boomerang, GIF
Template Sizes
- 2×6 – 600 x 1800
- 4×6 – 1200 x 1800
- 6×4 – 1800 x 1200
- 5×7 – 1500 x 2100
- 7×5 – 2100 x 1500
- 6×8 – 1800 x 2400
- 8×6 – 2400 x 1800
- Polaroid Digital – 1280 x 1600
- Square – 1600 x 1600
How did we get these numbers?
Inch x 300 (dpi) = pixel count
dpi means “dots per inch”. Also known ans ppi or resolution.
Browse our Stock Items
Example of the AI Segmentation – Character Reveal
Editing Your Template in Photoshop
Editing Rustic Mason Jar Template.
Resizing a template
Need us to Edit the Template for you?
Visit www.photoboothgraphics.com/order
TEMPLATE KEY
Below is a key of our layer styles that we use in Photoshop.
Green = Editable item
Red = Important info and layers that can not be deleted.
Orange = Elements
Violet = Frames and Photo Placements