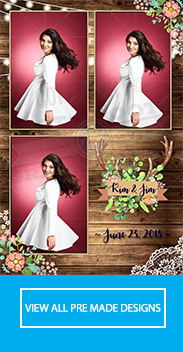
Adding your Static or Animated Overlay to your software step by step.
We are adding step by step instructions for each software we work with.
We always recommend using tinypng.com or compresspng.com to compress your overlay.png before uploading your templates to any software.
Snappic
How to create a new template in Snappic: https://www.youtube.com/watch?v=SUWLgXL4xdA&t=62s
Snappic VideoFX:
MP4 Overlay or APNG
- Pick a Template from the Template Library or Create a New Template.
- Resolution: Check to see which orientation you ordered. Square, Landscape or Portrat. Select whichever one you picked.
- Drop either MP4 Overlay or APNG into the Overlay Section.
- Click on Timeline
- Here is the tricky part: Depending on the template you pick you may have to adjust the playback range times in the Timeline. While changing these times keep an eye on the Total Time on the right side.
- Click Save and have a great event.
MP4 Mask
- Pick a Template from the Template Library or Create a New Template
- Resolution: Check to see which orientation you ordered. Square, Landscape or Portrat. Select whichever one you picked.
- Click on Timeline.
- Click on Add
- Add the “App Recorded Video”
- Click on “Build a custom effect”
- Give the template a name. Example: Masked Overlay
- Check “Save To Effect Library”
- Click on “Add effect”
- Click on “Masked Overlay”
- You will have two files. One that is design and the other that is called “masked” in the file name. Place the visual design in the “overlay” section. Place the black and white video into the “Clipping Mask” section.
- Click Save
- Here is the tricky part: Depending on the template you pick you may have to adjust the playback range times. While changing these times keep an eye on the Total Time on the right side.
- Depending on the effects you pick you may have to have multiple masked overlays to create the one long animated overlay. The easiest way is to pick one effect like Slow Motion then run the video for the entire length of the effect. If you need more than 3 effects then a 30 second video would need to be cut into Three 10 second mp4 mask with a total of 6 files. We would need to make this decision during the ordering process. Otherwise, you could use a video editing software to trim and make the extra videos.
- Click Save and have a great event.
Video Backgrounds or Background Wraps
- Select Timeline
- Click Add Element
- Add Element
- Add App Recorded Video
- Select the App Recorded Video
- Click “Build a Custom Effect”
- Select “AI Segematation”
- Click “Build a custom effect”
- Click “Overlay”
- Add your background wrap to the “Overlay” section.
Touchpix
Static Overlays .png – You must use a desktop or laptop computer. This is assuming you already have your event setup.
- Login into your Touchpix account on touchpix.com
- Click on Designer
- Click on Templates
- Dropdown click on “slowmo overlays”.
- Pick from the template size you purchased
- Click on Add template to apply (Green button on right side)
- On the left black bar click on “Uploads”
- Custom overlay: Browse for the download of the template you edited.
- Click on the preview to add it to the canvas in the middle.
- Click on Add Template
- Have a great event!
Touchpix Animated Overlays:
- Login into your Touchpix account on touchpix.com
- Click on Designer
- Click on Templates
- Dropdown click on “slowmo overlays”.
- Pick from the template size you purchased
- Download your video to the camera roll
- Transfer the files to “files”
- Open the Touchpix app on your iOS device
- Navigate to the camera tab
- Click on “Video Effects”
- Choose “Overlay Alpha”
- Select your file
- Have a great event!
Video Intros or Outros
- Download your video to the files app on your iOS device
- Open the Touchpix app on your iOS device
- Navigate to the camera tab
- Click on “Video Effects Creator”
- Place the intro into the “Pre Roll” and the outros into the ” Post Roll”
Curator Live
- Page 3 – Add PNG(S) to Event Wide Overlays
- -or- If you have multiple overlays use Page 4 and edit each experience at the bottom use “Overlays”.
- Page 4 – Image dimensions – Pick which size we sent you.
- 4:3 Ratio: 1080 x 1440 or 1280 x 1600
- Square: 1600 x 1600
- 4×6: 1200 x 1800 or 1800 x 1200
- 2×6: 600 x 1800 or 1800 x 600
Dakroom Booth
- Download and save (Do NOT open) from your email onto your photo booth computer
- Open Darkroom Booth
- On the right side on the output page you will see “choose” click that
- You will see the template catalog at the top you will see a black bar click on “ADD”
- Browse to the “downloads” folder and you will see the preview of the template.
- Click on “add all” or “add selected“
- Find your template and choose in the catalog and have a great event!
Fotomaster MirrorME
Follow the link below.


