Which templates work with my booth?

It’s pretty simple to grab the concept of which template to choose. If you are using a DSLR camera you MUST match your camera orientation. So, If your camera is mounted “portrait” the photo cut outs must be portrait*. If your camera orientation is “landscape” then your photo cut outs must match to landscape. The orientation of the whole canvas does NOT matter.

If you are using an iPad booth it does not matter which orientation you use.

Mirror booths, Ipad Booths Vs Traditional booths

Typically a Mirror Booth is in a “portrait” (vertical / up & down) camera orientation. The reason for this is the glass in the mirror is floor to ceiling in a portrait orientation. The reason why the mirror does this is to capture full body shots.

A Traditional Booth typically uses a “landscape” (horizontal / left to right). Landscape shoots wide. If you want to get big groups in a wider photo then this is the way to go.

An iPad Booth typically uses a “universal” (either orientation). Feel free to use any template. *check with your app developer that their app supports this function. (Ex: Curator & Snappic do)

Why does it matter with a DSLR? A DSLR camera is dependent on a mirror to take the photo in it’s correct orientation. That’s why you see professional photographers flipping or turning their cameras during a shoot.

*However, if you are shooting one photo and are ok with narrow cropping you can use a landscape camera orientation with a portrait photo cut out on your template.

Remember this: Your camera orientation must match your photo cut outs while using a DSLR camera.

Ipad and web cam booths

Doesn’t matter!

iPads and web cam booths are controlled by the software. You are safe with whichever template you want to pick! Just make sure your app uses the resolution we provide.

Example: Square we provide 1600 x 1600. 4×6 is 1200 x 1800. 2×6 is 1800 x 1200. 

Coordinates

Landscape Photo Coordinates

Download

Square Photo Coordinates

Download

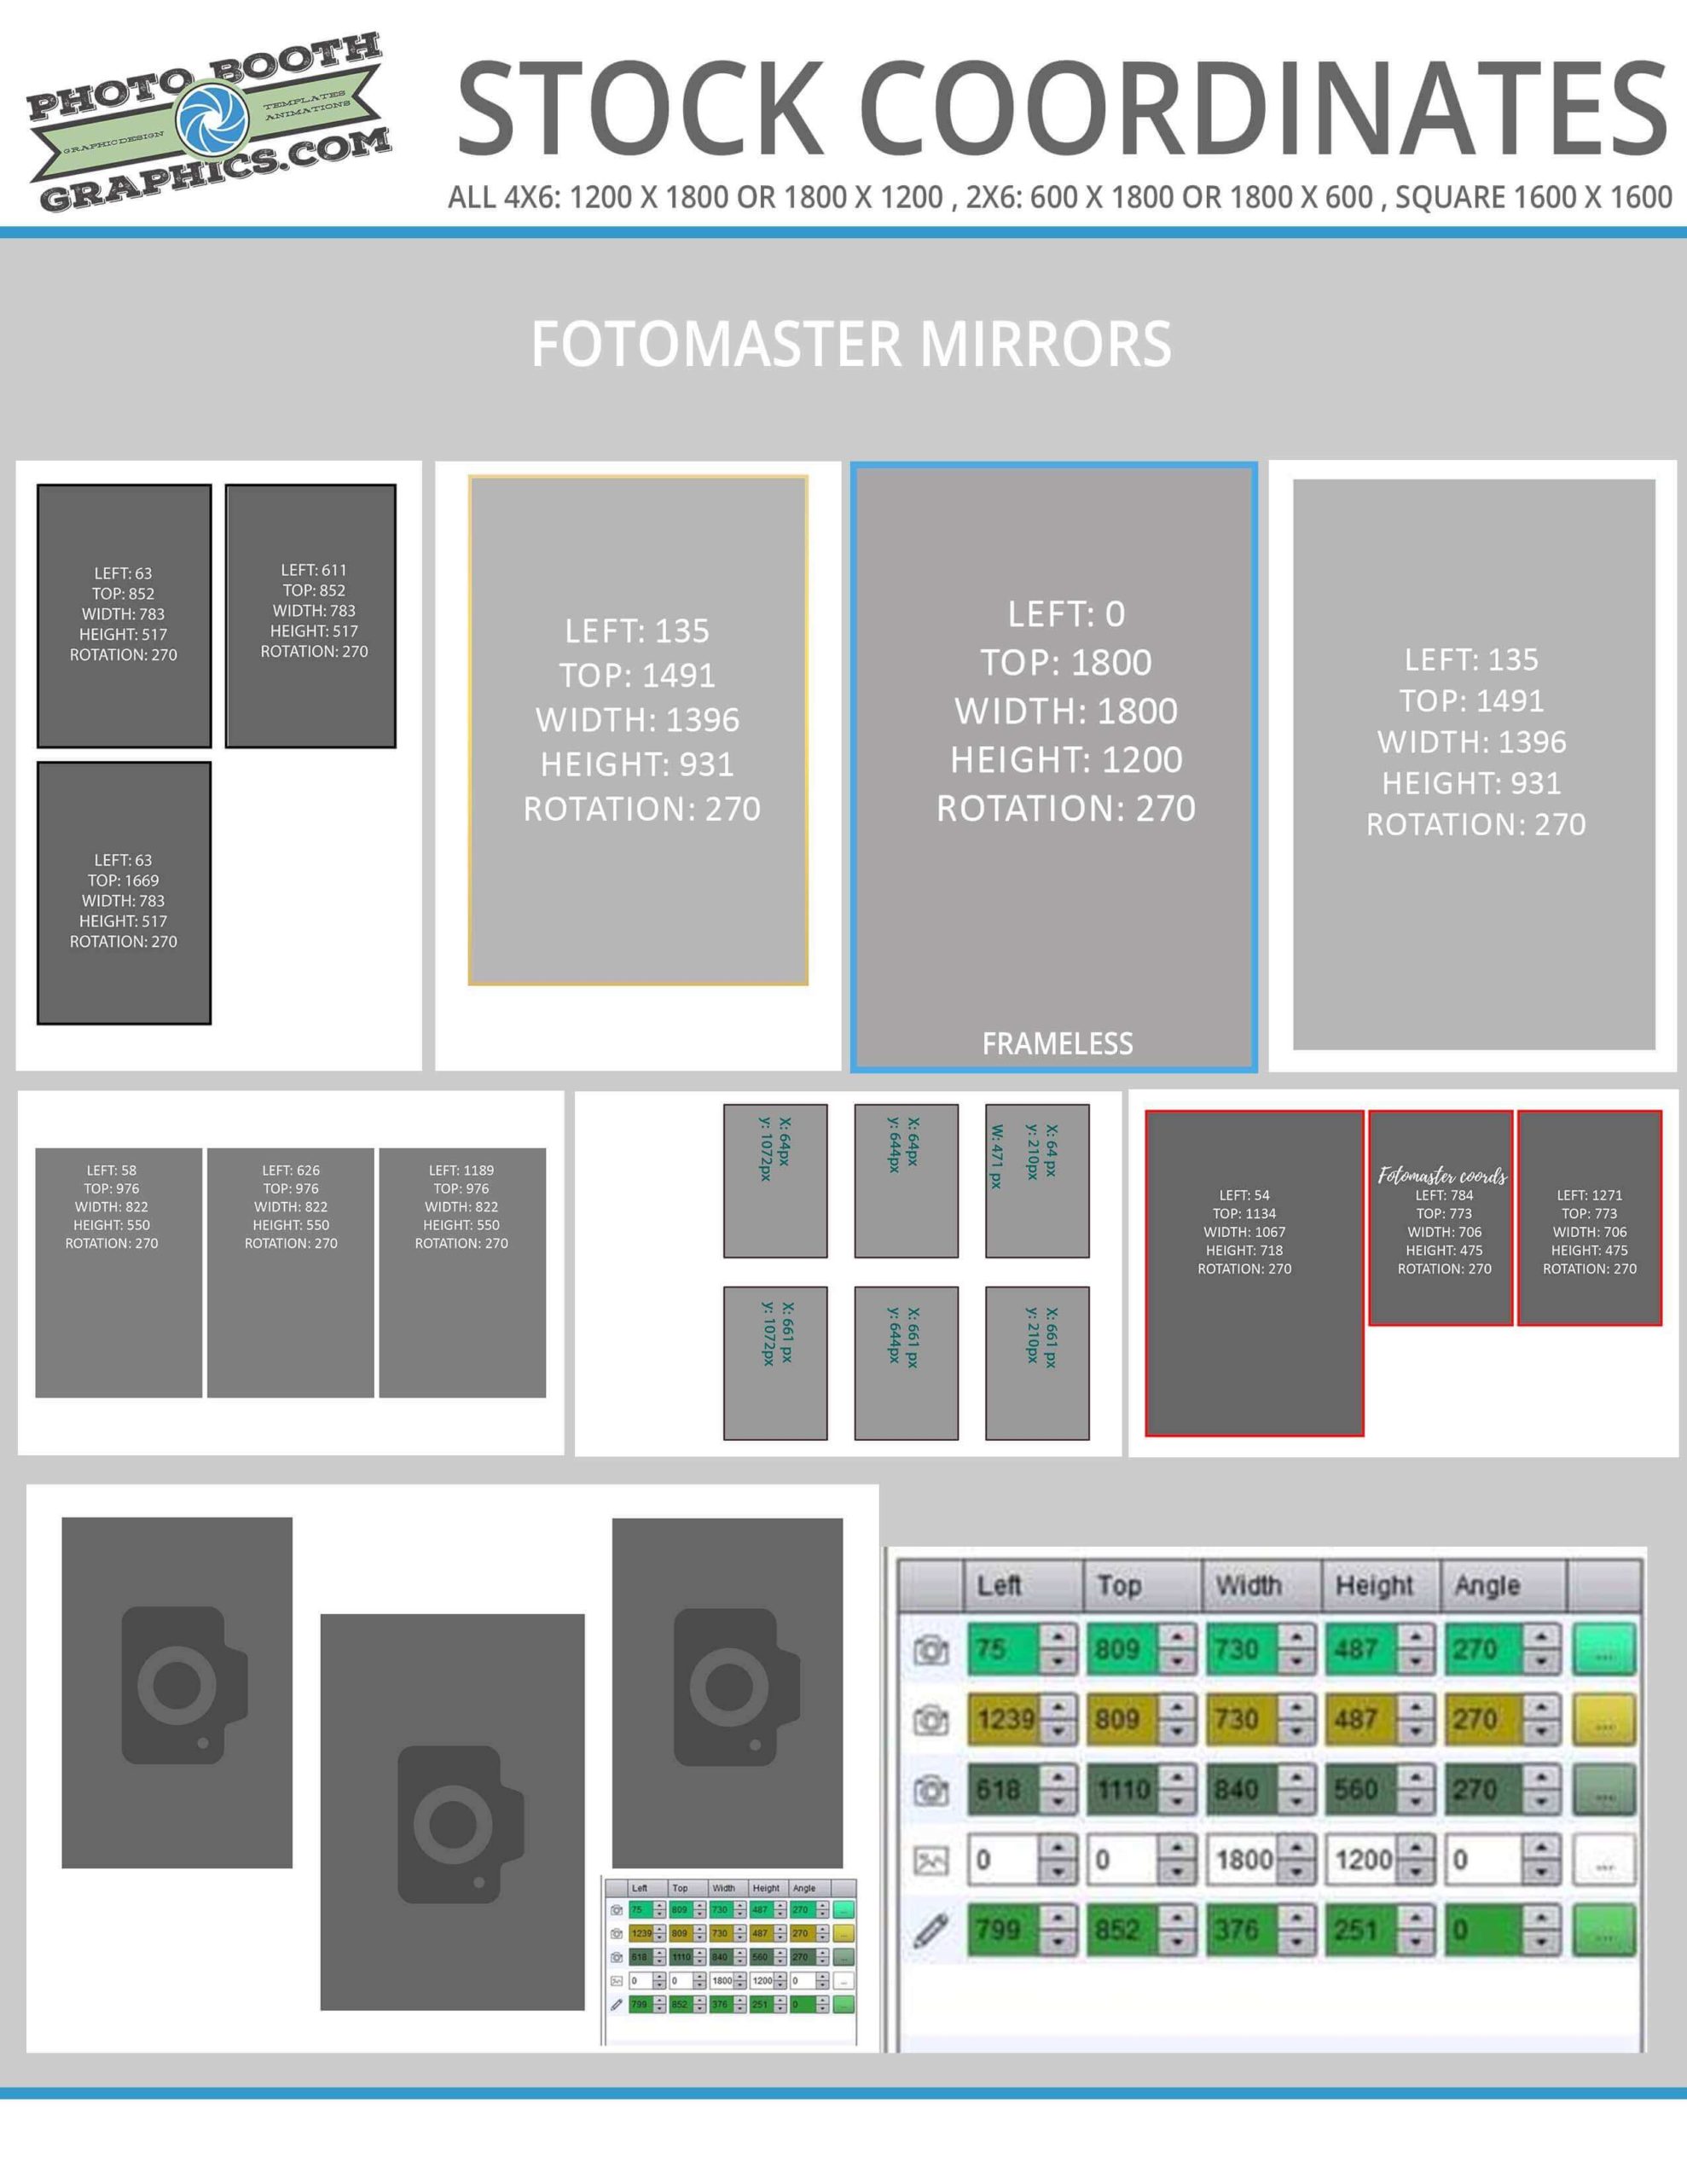
Portrait (Mirror) Photo Coordinates

Download

Fotomaster Portrait (Mirror) Photo Coordinates

Download

If you do not see a layout abve with the coordinates. Follow these directions to find the coordinates.

In Photoshop. Use the shape tool. Draw a rectangle or square (depending on the template) over the photo cut out. Go from Top left corner of the frame to the bottom right hand corner of the frame. We do have guidelines setup for each photo to get these coordinates. Go to windows > properties in photoshop. That will tell you the x (left), Y (top), Width and Height.

Is the template editable?

If you see the PS (Photoshop) and PSE (Photoshop Elements) logos in the right corner of the product display on the template you are looking at then it is editable. We make sure that we have that on every editable product.

We use photoshop to create the templates for you. If you need photoshop it is $10 a month using the photography plan on photoshop.com.

Alternatively, you could use any image editor that can open and edit layered photoshop files. photopea.com is an example of a free alternative.

What if I am using a template that doesn’t have the photoshop icons?
Typically, these are animated overlays or videos (start screens). You can watermark your animated overlays by adding the logo to each png file we give you in the folder. On videos you would need to use a video editor to add your watermark (logo) to the mp4 file we provide.